Step 1 - Selecting the apples
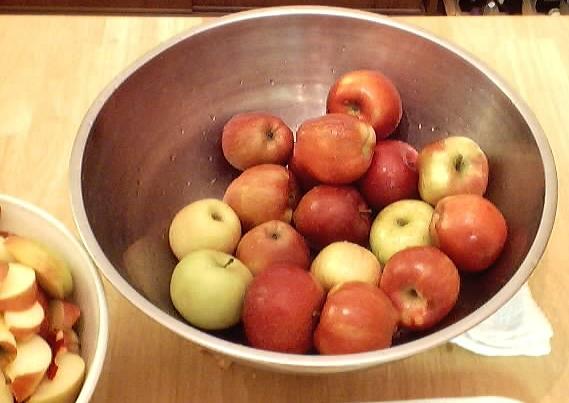
It's fun to go pick your own and you can obviously get better quality apples! But you can also dry apples that you purchase at a grocery store or farm market.
Also, you don't want mushy, bruised or rotten apples!
Which varieties? Whatever are your favorites! I prefer sweet, flavorful apples, like Fuji's, but any will work!
Step 2- Wash the apples
Just wash them in cold water, no soap. If you are going to remove the skins, don't spend too much time on it. Either way, be sure to remove any stickers that the grocery store put on the apples, though. Peelers often get suck on those.
Step 3 - Removing bruises and soft spots
Cut out any bruised or soft parts.
Step 4 - (Optional) Removing the apple skins
 If you do not want to remove the skins, skip to step 5. This is completely optional; some people prefer them with skins, some without. The type you buy in the stores usually has the skins intact.
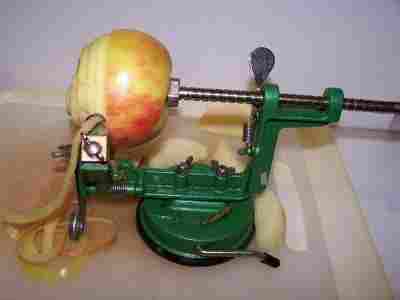
The mechanical apple peelers really DO work well - they're fast and easy; as long as the apples are firm and do not have many bruises or soft spots.
This type of peeler also cores (eliminating the seeds, stem and bottom at the same time) AND slices the apples into a spiral that is about 1/8 inch thick. I break it into nice rings. This little device really saves a lot of time!
Step 5 - Drying the apples
As I said at the beginning, you have 3 choices:

- A Food dehydrator - which is the easiest way, and since it is designed for this purpose, yields the most consistent results.
- An oven - everyone has one of these, so that means you need no additional equipment
- A car (well, or truck, suv, minivan, etc.) and a very hot , sunny day.
Regardless of the drying method you use, you spread the apple slice out on their trays and you may opt to sprinkle them with cinnamon or other spices!
Here are the specific directions for each method. NOTE: that there is a huge degree of variation in both moisture content and drying rate of different apple varieties, and ovens and driers vary considerably, too. The same variety will behave differently in different seasons. Plus you may like your slices more chewy or crisp than I do; which may require you to shorten or length the drying time. The key is to monitor the first batch closely, check them and sample them occasionally until they are the way you like and use that timing for future batches.
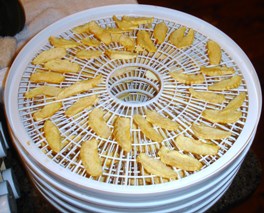
- Food dehydrator: Arrange the pieces on each rack so that air can circulate, preferably with a the pieces not touching each other, but there's no need to become obsessive about it. Some people prefer to sprinkle the apples with some spices (typically cinnamon, nutmeg or allspice). Turn the dehydrator on and enjoy the aroma. If your food drier has a thermostat, set it for 140 degrees F. It will take 12 to 24 hours. See "how to tell when they are done" in step 7, below.
- Oven: preheat the oven to 150 degrees F (65 degrees C or gas mark 1). If you don't have these settings, just use the lowest setting you've got. Arrange the apples on cake racks, spread out, not touching each other. Cookie sheets will work if you don't have cake racks or screens - but your need to flip or stir the apples once in a while to expose the other side of them. Some people prefer to sprinkle the apples with some spices (typically cinnamon, nutmeg or allspice). Close the oven. It takes about 10 to 20 hours, but you'll need to check periodically, including rotating the shelves and moving them up or down to get even heating. If you want to speed it up, you can bump the heat up to as high as 200 degrees F ( 93 degrees C), but you'll need to watch them much more closely. See "how to tell when they are done" in step 7, below.
- Automobile and a hot sunny day: It sound strange but the same stifling hot car that burns your legs makes an excellent food dryer. Spread the apple slices out on shallow trays (they work better than cookie sheets, since you don't need to worry about leaking juice!). over them loosely with cheesecloth to keep any potential for bugs to come in contact. Put the trays on the dashboard of your car and roll all the windows up and park in the sunniest spot you've got. It's best to start in the morning and let it go to sunset. It may take 2 days - bring the apples in the house overnight. Some people prefer to sprinkle the apples with some spices (typically cinnamon, nutmeg or allspice) but you'll need to check periodically. See "how to tell when they are done" in step 6, below.
Step 6 - How to tell when they're done
The amount of time it takes depends on the water content of the apples, the thickness of the slices, and how well the air is able to circulate around them. When done, the apples should be flexible, like a raisin from a fresh bag; not brittle. Most describe them as leathery with a deep red color, without free water or a tacky feeling. If you want them drier, more crispy, that's fine, but you need to dry them at least to the consistency of a raisin, or they won't keep!
Step 7 - Cool, then Fill the Zipper-type bags
Let the apples cool to room temperature (about 20 to 30 minutes), then fill the bags. Don't overfill the bags, leave a little room for expansion. Do try to avoid leaving any air pockets! A vacuum bag is shown at left, but you can use ziploc (or similar) bags, show below. But be sure to squeeze out the extra air (below left is before, below right is after squeezing out the excess air)
Step 8 - Vacuum seal the bags (if you have a vacuum sealer)
Obviously if you haven't got a vacuum food sealer, just inspect the bags and you may need to open them and reseal them to eliminate any air pockets! TIP: If you don't own a vacuum food sealer to freeze foods, place food in a Ziploc bags, zip the top shut but leave enough space to insert the tip of a soda straw. When straw is in place, remove air by sucking the air out. To remove straw, press straw closed where inserted and finish pressing the bag closed as you remove straw.
Step 9 - Store the bags in a cool, dark place
On a cool, dark shelf, the dried apples will retain their color and flavor for about 6 to 9 months. If you want to store them longer than that, just put them in the freezer instead!
Borrowed from: http://www.pickyourown.org/apples_dried.htm
No comments:
Post a Comment